
Templates
- Modules
- Connectors
- Audio
- Calendar
- Clock
- Countdown
- Currencies
- Dashboard
- DataSet
- Embedded
- Emergency Alert
- Flash
- Google Traffic
- HLS
- HTML Package
- Image
- Local Video
- Mastodon
- Menu Board Category
- Menu Board Products
- National Weather Service
- Notifications
- PowerPoint
- Shell Command
- Stocks
- Ticker
- Video
- Video In
- Weather
- Webpage
- World Clock
Templates
Use Templates to speed up the design process and ensure a corporate standard is maintained.
Feature Overview:
- Use existing published Layout designs to easily save as Templates.
- Create and manage Templates from a dedicated page for easier management.
- Add Zones to Templates to act as content placeholders on a Layout.
- Set Share options to restrict User access to selected zones on a Template.
- Show Published Templates for selection in the Layout Editor.
- Speed up the entire Layout design process for all Users.
- Apply a standardised look to all Layouts.
Create new Templates or save your existing Layout designs to use as Templates for future Layouts.
Select from one of our designed templates from the Xibo Exchange. by clicking the button below Templates from the Toolbox.

Create Template
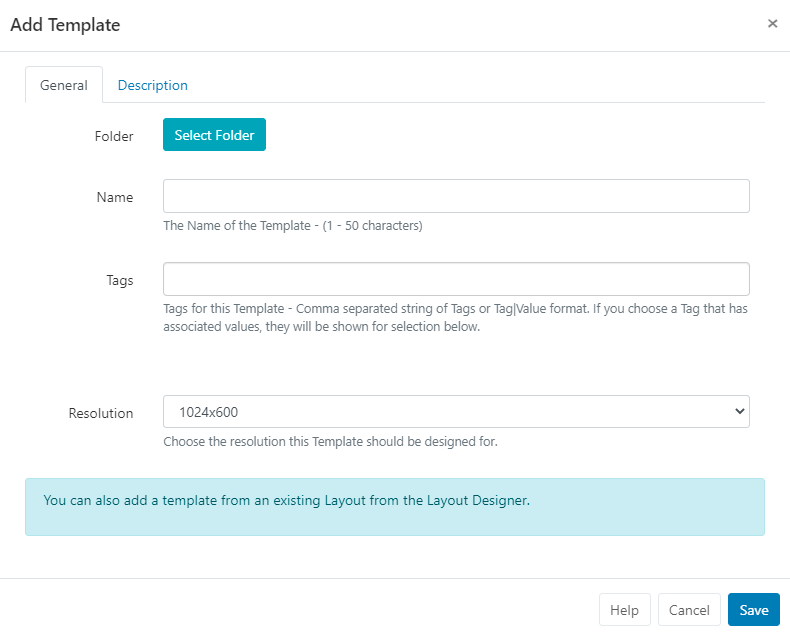
Templates are created by selecting Templates under the Design section of the main CMS menu.
- Select the Add Template button and complete the form fields.
-
Give your Template a Name for easy identification in the CMS.
-
Select the Resolution.
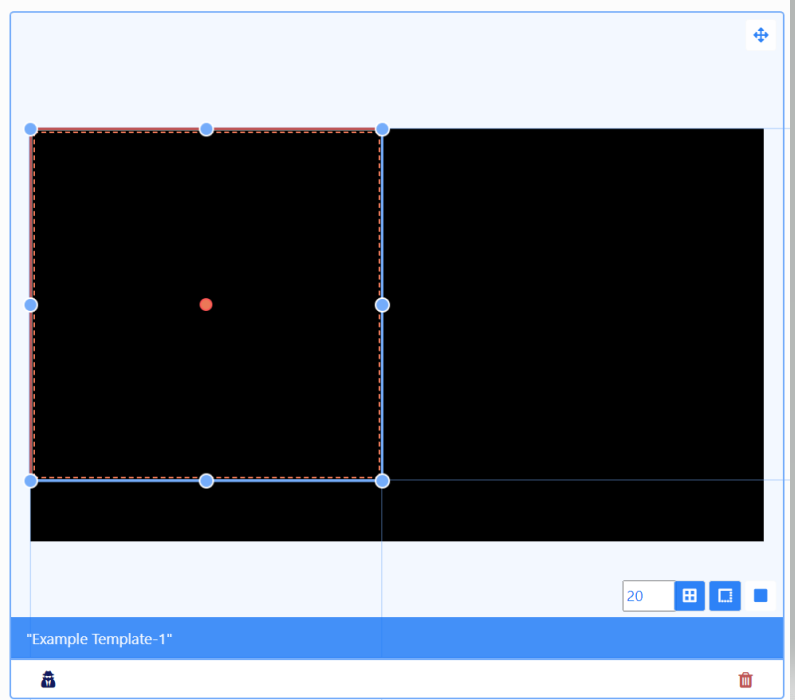
On Saving, the Layout Editor will automatically open with one full size Zone.
Zones are used to define areas on a Layout which content can be added to.

Adding Zones
- Click anywhere on the zone to resize and position:
Zones can be added from the toolbar:
- Click on the top Widget button.
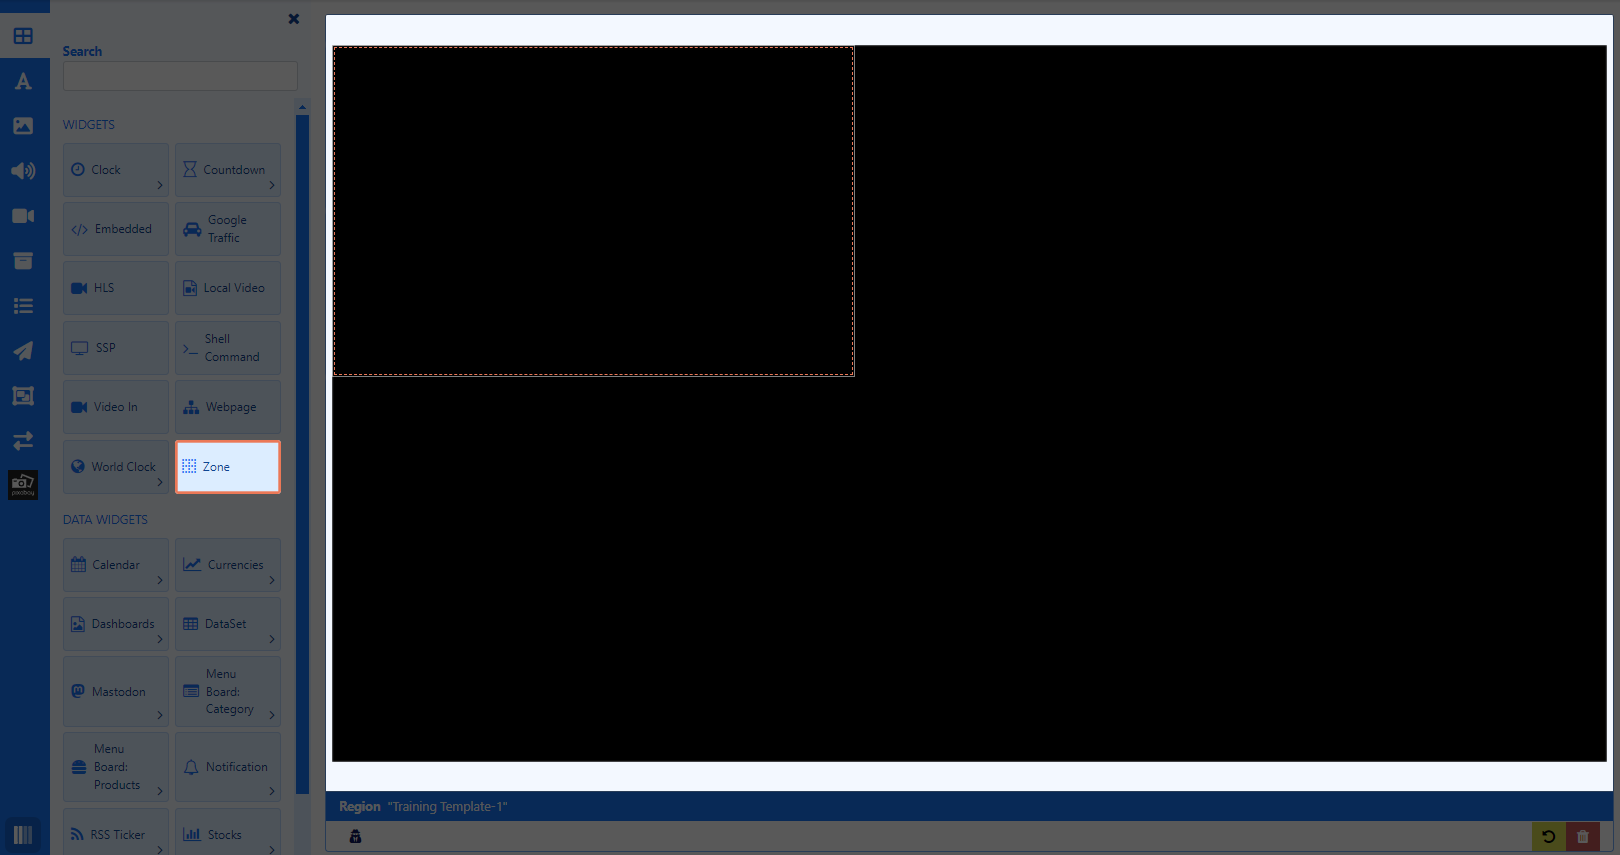
- Select the Zone and drag and drop or click to add.
- Resize and Position.
Layering
From the Properties Panel, select the Positioning tab to set Layering for overlapping Zones/ added content.
Add both content from the Toolbox and Zones to build your Template design.
Once your Template is complete, use the menu at the top of the editor to Publish:
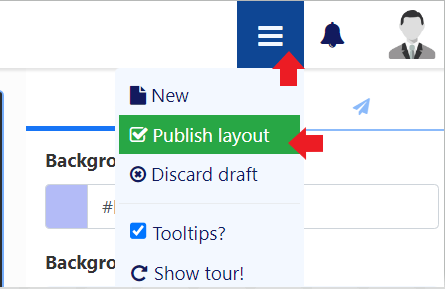
Published Templates will show for selection from the Toolbox of the Layout Editor.
Save Layout as Template
Published Layouts can be saved as a Template from two locations:
- From the Layout Editor:
- After Publishing go back to the menu and select Save Template:
- From the Layouts grid:
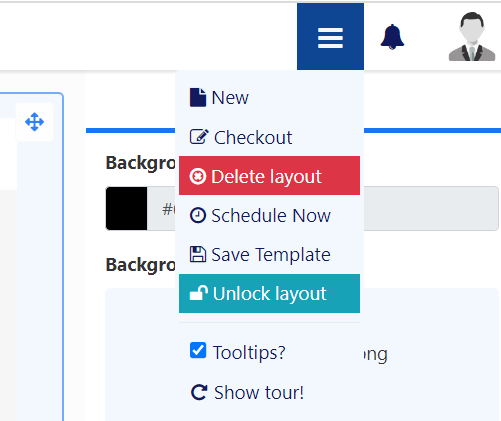
- Use the row menu for a Published Layout and select Save Template.
Complete all relevant form fields to save the selected Layout as a Template.
- Save
Tagging a Layout as a ‘Template’ will also add your designs to your Template list!
Row Menu
All Templates have a row menu where Users can access a list of actions/shortcuts.
- Notable settings are listed below:
Alter Template
Select to make design changes to the Template in the Layout Editor.
Checkout
To make edits to a Published Template click to Checkout and create a draft. Once edited the Template can be published to make the changes permanent overwriting the existing Template. Discard will revert the Template back to its original published state.
Publish
Publish will ensure that the Template is shown for selection from the Toolbox.
Discard
Discard all changes made to a draft and revert back to the previous Published version.
Share
Set Share options for User/User Group access to individual Templates.
Export
Export the Template including all associated Widgets/Media/DataSet structures to a ZIP file, so it can be easily shared.
Use the With Selected option at the bottom of the Templates grid to perform bulk actions for multiple Templates!
