webOS Firmware Guide
- Xibo for Android
- DSDevices DSCS9X/95 Set-up Guide
- Install a White Label or a different Player version on DSDevices
- CEC Screen Power on/off with DSDevices
- Hardware Recommendations
- Philips Signage SoC Monitors
- Sony Bravia SoC
- Hisense Commercial Displays SoC
- Managing Storage on the Android Device
- Player Settings
- Players without an Internet Connection
- Remote Administration with SS Helper
- Restart Rooted Device with a Shell Command
- Running Xibo for Android
- Resolving Common Issues
- Error shown when I try to licence my Player?
- Player not updating from the CMS?
- I can see my Licence entry but the Player appears unlicensed?
- Error message - Player is missing dependencies
- My scheduled Layouts are not working?
- Layout won't play? Splash screen plays?
- Watchdog error message
- Troubleshooting for Administrators
- Audit Trail
- Log Information
- Player Logs
- Getting the Player Status
- Request Player Status via CMS - Logged in Players only
- Request Player Status directly from a Device
- Can I use the Xibo name / logo?
- Can I run a Xibo Player on Raspberry Pi?
- How can I increase the upload file size limit?
- How do Players communicate with the CMS?
- How many displays can Xibo support?
- How do I reset the Xibo_admin account password?
- Power On/Off for Players
- Why do I need a Default Layout?
- Xibo for Android FAQ's
- Gapless Playback
- Autoplaying Embedded Youtube Videos
- Closing to Home screen
- Displaying Images
- Embedded TV
- External SD card not listed when running Banana-Pi
- Helper Command to change Time zone
- HTML5 Video
- Memory Notifications
- Menu not accessible
- SSL Support
- Using Portrait Displays
- Video wont play properly
webOS Firmware Guide
It is important to make sure your webOS devices are running the latest firmware to ensure that all security and performance improvements are up to date. You can check the recommended firmware version of your webOS devices by clicking this link.
How to check Installed Firmware Version
Once you know the firmware version recommended for your hardware, you can compare this to the currently installed version. This information can be found in two locations:
1. Dashboard Menu
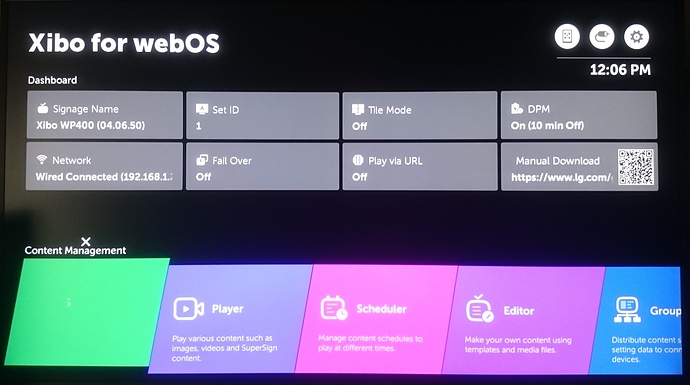
Press the Home button on your remote to reveal the webOS dashboard. You will see the currently installed firmware version listed in brackets, under the Signage Name entry:

2. System Settings menu
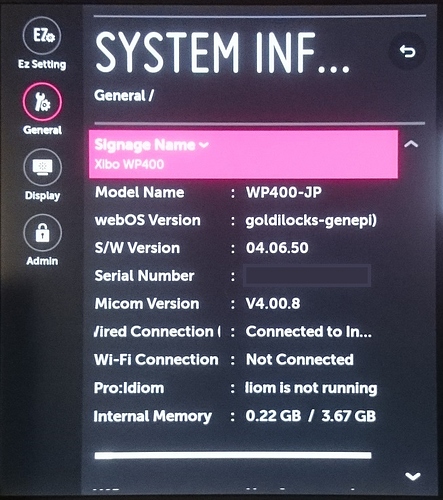
Press the Settings cog button on your remote control to open the Settings window on the left hand side of the screen. Choose the General option, followed by System Information.
You will now see the firmware version listed under the S/W Version entry:

How to Upgrade your Firmware
If you discover that the firmware is out of date, you will need to upgrade it to ensure that you have all of the latest fixes and improvements for your hardware.

You can update the firmware on a webOS monitor via a USB or remotely using the Control Manager built into the webOS device.
Local Upgrade via USB
- Create a folder in the root directory of a USB storage device.
- Rename the folder to LG_MONITOR.
- Copy the Firmware EPK into the folder.
- Connect the USB to the monitor and a message will appear on screen.
- You will receive confirmation once the update is complete.
Remote Upgrade using Control Manager
Please note that you will need to have a saved copy of the firmware EPK saved on the machine you plan to use for the remote upgrade.
- Using a machine on the same local network as your webOS device, open a web browser and go to the private IP address for that webOS device. Please note that you must use the http protocol. For example if the private IP for your device is 192.186.1.100, you will need to enter
https://192.168.1.100:3737.
Advanced options and choose to proceed to that IP address.

- You will be greeted with a password entry screen, which also includes a 4 digit code for authentication. Enter the password for your device and the code you can see and choose
login.

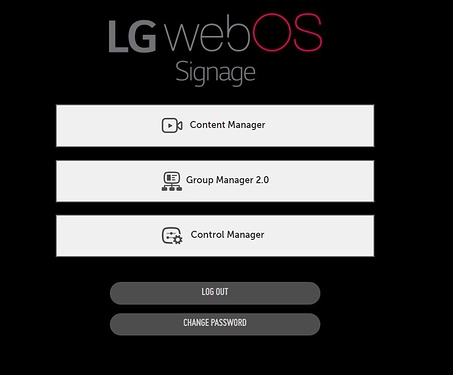
Now that you have logged in, you will see 3 options:

- Select
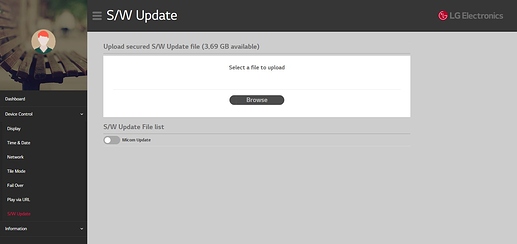
Control Manager. - You will see menu options on the left hand side of the screen. Click the
Device Controloption to reveal theS/W Updateoption, as shown in the screenshot below:

- You can now upload the firmware you have downloaded to your device using the
Browsebutton to locate the EPK on your local machine.
Downgrading your Firmware
You may find on occasion that you need to revert to a previous firmware. If this should happen, you will need to override the standard settings to force the device to install an older version.
This can be completed locally on the device:
- Follow the steps outlined above for the Local Upgrade via USB method.
- After you connect your prepared USB to your device, press the
Settingscog button on your remote control. - Highlight the
Generaloption and press the7key on your remote seven times until theSoftware Updatepage opens. - You will see the option to select the firmware on your connected USB. Press the
Updatebutton to start the upgrade.
You will receive a confirmation message once complete.


